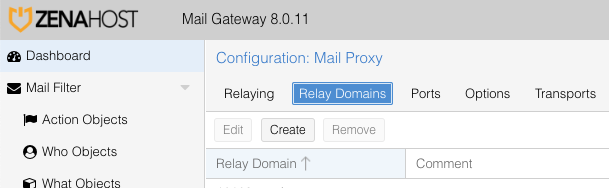
Export Hestia mail domains into the Relay Domains in Proxmox Mail Gateway 8

See my blogpost about using PMG with Hestia. This is a quick and dirty script to get all Hestia mail domain names for all Hestia users into the Mail Proxy Relay Domains list.

First, on Hestia, export all configured mail domains for all user:

for user in $(v-list-users | awk '{print $1}')
do 
 v-list-mail-domains $user | awk '{print $1}' | grep -v -e 'USER' -e 'DOMAIN' -e '------' -e 'Error:' >> relay_domains.txt
done

Get the relay_domains.txt file to your Proxmox master or node server and run the import:

while IFS= read -r domain 
do
 pmgsh create /config/domains --domain $domain
 echo "Added relay domain: $domain" 
done < relay_domains.txt

Done.

Now you can continue with setting up the mail domains settings as described here.

HestiaCP / Hestia – Batch change mail domain settings for use with Proxmox Mail Gateway

So I have a very cool (and quite full) Hestia server but I do not like the anti-spam capabilities and I wanted to have a reliable incoming and outgoing mail cluster before it. I therefor installed Proxmox Mail Gateway 8 on three nodes to do the filtering. But I have over 20 users and more than 100 mail domains to change.

SO! Batch-mode on.

What I wanted is to disable anti-spam, antivirus and reject spam settings. And also enable the smart relay to use the PMG cluster for outgoing mail.

After importing all mail domain names into Proxmox as ‘relay domains’ (trusted domains for which Proxmox can accept emails), I wrote this script to get all configured mail domains for a Hestia user and change the settings.

Just save it as mailchange.sh, do a chmod +x mailchange.sh and run it with a username:

./mailchange.sh hestia.username

The script:

#!/bin/bash
clear
# Change this to your PMG cluster host and the relay port 
relayhost="relay.domain.com"
relayport="26"
RED="\033[31m"
GREEN="\033[32m"
NORMAL="\033[0;39m"
if [ -z "$1" ]; then
  printf "$RED"
  echo "Error: The first argument must be a valid username."
  printf "$NORMAL"
  exit 1
else
  user="$1"
fi
# Getting all domains for username
v-list-mail-domains $1 | awk '{print $1}' | grep -v -e 'DOMAIN' -e '------' -e 'Error:' > $1_domains.txt
# Showing current mail domain settings
echo ""
printf "$GREEN"
echo Current mail domains and settings
echo ""
printf "$NORMAL"
v-list-mail-domains $1
# You can still get out of here!
echo ""
printf "$RED"
read -p "Ready to change the settings? (yes/no) " yn
case $yn in
yes ) printf "$GREEN";
echo OK, we will proceed;;
no ) echo exiting...;
  printf "$NORMAL";
exit;;
* ) echo invalid response;
exit 1;;
esac
printf "$NORMAL"
while IFS= read -r domain
do
    echo ""
    v-delete-mail-domain-antispam $1 $domain >/dev/null
    v-delete-mail-domain-antivirus $1 $domain >/dev/null
    v-delete-mail-domain-reject $1 $domain >/dev/null
    v-delete-mail-domain-smtp-relay $1 $domain >/dev/null
    v-add-mail-domain-smtp-relay $1 $domain $relayhost "" "" $relayport >/dev/null
    printf "$GREEN"
    echo "Removed settings and added smart relay for domain $domain"
    printf "$NORMAL"
done < $1_domains.txt
echo ""
printf "$GREEN"
echo New mail domains and settings
echo ""
printf "$NORMAL"
v-list-mail-domains $1

Before:

After:

Done!

Hetzner – Proxmox / ESX – Sophos / pfSense additional IP network config – working & solved

Got a root server at Hetzner with 1 extra public IP address (next to the one provided). Wanted to install Debian and Proxmox on it so I can have a cheap Virtual Machine host. You can also install VMware ESX but then you need to ask them to attach a KVM-over-IP unit and didn’t want to bother.

Networking was a bit of a pain but I got it all configured:

– Proxmox is using the first public IP address so you can manage it externally.
– The second public IP address is needed to assign it to Sophos UTM / pfSense or any firewall of your choice.

This firewall will then NAT incoming traffic to your internal VM’s. In this example, 188.45.45.87 is the MAIN public IP address and 188.45.45.81 is the ADDITIONAL one.

Proxmox network config: 

# network interface settings
auto lo
iface lo inet loopback
iface eth0 inet manual
iface eth0 inet6 static
 address 2b01:4g8:140:14d7::2
 netmask 64
 gateway fe80::1
auto vmbr0 ## Public IP address for Proxmox
iface vmbr0 inet static
 address 188.45.45.87
 netmask 255.255.255.192
 gateway 188.45.45.65
 bridge_ports eth0
 bridge_stp off
 bridge_fd 0
auto vmbr1 ## Interface for internal LAN networking
iface vmbr1 inet static
 address 192.168.0.254
 netmask 255.255.255.0
 gateway 192.168.0.1
 bridge_ports none
 bridge_stp off
 bridge_fd 0

Check if you can reach your Proxmox server on your public IP address. Now, get an additional IP address using Hetzner’s Robot control panel. Once assigned, make sure you request a separate MAC address for the new IP address !!! In this example, 188.45.45.81 has a separate MAC address of 00:50:xx:00:xx:EE

Screen Shot 2015-03-18 at 14.15.12

In Proxmox, create a new VM and assign 2 network cards. One will be used for the LAN (vmbr1) and the other one for the WAN (vmbr0). Screen Shot 2015-03-18 at 14.15.03   The MAC address of the WAN address needs to match the MAC address you’ve requested previously using Hetzner’s Robot ! Screen Shot 2015-03-18 at 14.16.56       To configure your Sophos or pfSense firewall, you’ll need to create a SSH tunnel to the internal IP address of the firewall, as it won’t yet have the additional public IP address configured and probably need to finish the configuration using SSH or a browser. So, use this command (please adjust for your IP settings):

sudo ssh -L 4444:192.168.0.1:4444 root@188.45.45.87

In your browser, navigate to https://localhost:4444/ and finish configuring your firewall. Important: your WAN IP address is the additional IP address. Gateway and netmask are the same as the MAIN IP address.

Enable a DHCP server on your LAN and that’s it! Now you can install your VM’s and get an internal private IP address (as long as you assign vmbr01 in Proxmox to the VM) and use your firewall to NAT outside traffic to the inside.