Synology DSM 4.1’s VideoStation and DVB-T channels list fix

Tried to get my EyeTV Diversity DVB-T USB stick to work with my Synology DS-1512 and the VideoStation program.
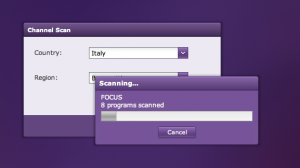
DSM recognises the USB stick but when I tried a channel scan (selecting Country: Italy and Region: Italy), nothing came up.

So, it must be a faulty channel list then. DSM VideoStation uses this list:

/volume1/@appstore/VideoStation/etc/synodvb_t/Italy

and this contains:

# T freq bw fec_hi fec_lo mod transmission-mode guard-interval hierarchy

### VHF - Band III ###
# 5
T 177500000 7MHz 2/3 NONE QAM64 8k 1/32 NONE
# 6
T 184500000 7MHz 2/3 NONE QAM64 8k 1/32 NONE
# 7
T 191500000 7MHz 2/3 NONE QAM64 8k 1/32 NONE
# 8
T 198500000 7MHz 2/3 NONE QAM64 8k 1/32 NONE
# 9
T 205500000 7MHz 2/3 NONE QAM64 8k 1/32 NONE
# 10
T 212500000 7MHz 2/3 NONE QAM64 8k 1/32 NONE
# 11
T 219500000 7MHz 2/3 NONE QAM64 8k 1/32 NONE
# 12
T 226500000 7MHz 2/3 NONE QAM64 8k 1/32 NONE

… etcetera, etcetera. Using this (Italian) channel site http://www.dgtvi.it/copertura.php, I looked up the stations that are available in my are (Monte Fasce) and put them manually in a new file called ‘My Region’:

/volume1/@appstore/VideoStation/etc/synodvb_t/My Region
T 682000000 8MHz AUTO AUTO AUTO AUTO AUTO NONE
T 786000000 8MHz AUTO AUTO AUTO AUTO AUTO NONE
T 642000000 8MHz AUTO AUTO AUTO AUTO AUTO NONE
T 674000000 8MHz AUTO AUTO AUTO AUTO AUTO NONE
T 546000000 8MHz AUTO AUTO AUTO AUTO AUTO NONE
T 514000000 8MHz AUTO AUTO AUTO AUTO AUTO NONE
T 626000000 8MHz AUTO AUTO AUTO AUTO AUTO NONE
T 722000000 8MHz AUTO AUTO AUTO AUTO AUTO NONE
T 594000000 8MHz AUTO AUTO AUTO AUTO AUTO NONE
T 698000000 8MHz AUTO AUTO AUTO AUTO AUTO NONE
T 758000000 8MHz AUTO AUTO AUTO AUTO AUTO NONE

Now, turning back to VideoStation, I was able to select this new region file and WOW: it’s working!
VideoStation is now happily scanning for channels.

Loading drivers in ESXi 5.0

So I upgraded to 5 from 4.1 – Cool. Almost. Vanilla install had no support for my Promise SuperTrak EX-8654 card which I have in my HP MircoServer. Now what?!?!?
Well, after a lot of searches, the solution was actually on the Promise site! Yay for them!

So in short an example of you to load a driver on esxi 5.0.

1) Enable ssh access on your esxi 5 host (what do you mean you’ve already done that? It’s dangerous!)

2) Get you driver. The 8654 driver I got from the Promise support site was called 'scsi-stex-4.07.0000.75-1OEM.500.0.0.472560.x86_64.vib'. Yep, what’s in a name.

3) Copy over the driver to the host using scp
ex: scp <driver name> root@<esxi_5_host_ip>:/tmp

4) Next ssh to the esxi host, go to /tmp

5) Install the driver
esxcli software vib install -v /tmp/<driver name>

6) Reload the esxi host – Oh I hand’t told you? Well you need the driver right?

7) Then ssh to the esxi host and check if the driver loaded with 'esxcli software vib list'
In my specific case it looked like this:

~ # esxcli software vib list
Name        Version                             Vendor   Acceptance Level  Install Date
----------  ----------------------------------  -------  ----------------  ------------
scsi-stex   4.07.0000.75-1OEM.500.0.0.472560    Promise  VMwareCertified   2011-12-26

8) Sit back and enjoy the fact you have access to the disks again for adding as a datastore.

Adding a non-VMFS drive to your ESX(i) server and use it!

I had some spare Windows drives lying around and wanted to put them in my HP MicroServer running ESXi 4.1.

After installing the SATA drive, and rebooting, I tried to simply add the drive in the vSphere console. No love from VMWare — I got the message, “Error while adding drive – disk not available.” Hmmm. I was sure the drive was working.

Turns out that in ESXi, once a disk has been written to, in any format, it won’t initialize.
Here’s what it took to add the drive in:

Low-level formatted the drive (the name of the drive might be shorter or longer):
~ # dd if=/dev/zero of=/vmfs/devices/disks/t10.ATA_ST3500413AS_Z2A3TKQ6 bs=512 conv=notrunc

Try adding the disk to your datastore now; I canceled this command after waiting 5 minutes and noticed that ESXi now saw the disk as a ‘blank disk’. Adding it to my datastore now worked! If not, continue…

Recreate the partition table:
~ # fdisk /vmfs/devices/disks/t10.ATA_ST3500413AS_Z2A3TKQ6

Then ‘o’ to Create a new empty DOS partition table
Then ‘n’ to add a new partition. I used Primary as the type, and 1 as the partition number.
Then ‘t’ to change the type. ‘fb’ is the code for VMFS 3.0
Then ‘w’ to write everything to the drive

Finally, use the ‘vmkfstools’ program to create the volume. I added it as a new datastore using the following command:
~ # vmkfstools -C vmfs3 -S Datastore2 /vmfs/devices/disks/t10.ATA_ST3500413AS_Z2A3TKQ6

As always, YMMV.

Hide your drive from the desktop in OSX

Sometimes you simple need all your drives on your desktop, but the ones like ‘TimeMachine’ or ‘Lion Installer’ can also simple disappear. Use this script to hide them at every reboot, without having to unmount them. Adjust your volume name to reflect yours.

sudo echo "echo \"UUID=$(diskutil info /Volumes/Lion\ Installer/ | grep UUID | awk '{print $3}') none hfs rw,noauto\" >> /etc/fstab" | sudo bash

To see if it has worked:
sudo cat /etc/fstab

Results in:
UUID=F4F6562F-1C4D-361D-BBD4-91C12ED96B44 none hfs rw,noauto

If your /etc/fstab doesn’t show the UUIC, then you need to check the volume name and/or delimit spaces with an \.

Print protected PDF files on OSX – using the terminal

The newer versions of Preview (at least OS X 10.5, and maybe earlier) respect the “do not print without a password” setting in PDF files. However, it is possible to create a completely unprotected version of any PDF file using ghostscript. A command like this should work:

gs -sOutputFile=MyNewFile.pdf -sDEVICE=pdfwrite -dNOPAUSE -dbatch -q MyProtectedFile.pdf

You may need to type “quit” at the command prompt after gs finishes processing the file. Then open the newly created PDF file and voilà, printable!

(Sony) XDCAM Transfer for OS X

So as I now and then have to fix up a OS X + FCP install with XDCAM PDW-U01 import functionality, here is a short howto:
1) PDZK-P1 XDCAM Transfer, now 2.12
2) Mac i.Link FAM driver
3) XDCAM Browser, currently 1.2

The links might break, so here is the official Sony XDCAM site.

I am not affiliated with Sony, nor do they pay me for this. It’s just a braindump for myself and hopefully others will find this helpful!

The Windows multiple program installer thingie…

I keep forgetting this GREAT tool. After a nice clean Windoze install, all it takes is one visit to http://ninite.com/ and a few clicks, and your all set as far as software goes. Download the bundled installer click on it, and go for coffee… 🙂 Joy!

Before throwing rotten tomatoes, yes this is Windows only… my bad! No I don’t have shares or anything. I’m just lazy!

[solved] OS X 10.7 Lion and mail search not working…

I was stunned to find out that the search function on the Mail.app wasn’t working anymore since I’ve upgraded my Mac from Snow Leopard 10.6.8 to (the very cool) Lion 10.7. Thought it could be Spotlight not working, or something else.

Well, as it turns out, it’s a combination of 2 problems:

1) turn Spotlight indexing on: sudo mdutil -i on /
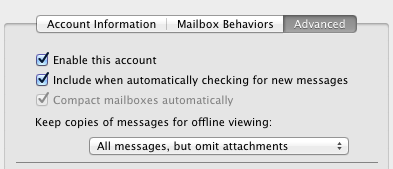
2) when using IMAP, configure your account to Keep a message for viewing offline

That’s it! Where Snow Leopard was able to search thru already downloaded mail (although the above option was enabled), Lion can’t.

Now the search is working great!

OSX: Screen Sharing over the internet

Here’s a quick write-up describing how to connect to your Mac at home from your Mac at work (or any other Mac…).

Prerequisites

1) User access with administrator’s rights on your remote OS X computer.

2) An Secure Shell (SSH) client on your local computer. On Windows, Puttyis a common and free version. Linux and MAC OS X, by default, come with SSH.

3) A VNC viewer client on your local computer.  In our case, we’ll using Screen Sharing. You won’t find it in the finder; it’s hidden here:

/System/Library/CoreServices/Screen\ Sharing.app

4) Network access to the SSH service on your remote machine.  This requires

a)  You know your remote machine’s hostname or IP address.
b)  Being behind the firewall, having VPN access, or being accessible to the public Internet (i.e. no firewall).

How to Remotely Turn On (and off) OS X Screen Sharing

This procedure keeps security in mind.  The idea is to turn on screen sharing while you need it, and then turn it off when you’re done.

1)  SSH into your remote OS X machine with an administrator’s log in and password.

2) Enable Remote Desktop (a.k.a. Screen Sharing, a.k.a. VNC) with this command:

sudo /System/Library/CoreServices/RemoteManagement/ARDAgent.app/Contents/Resources/kickstart -activate -configure -access -on -clientopts -setvnclegacy -vnclegacy yes -clientopts -setvncpw -vncpw password -restart -agent -privs -all

3) Login using a VNC client. You can use Screen Sharing or Chicken of the VNC (see tip below).
Your password is “password” (see the -vncpw flag in the above command;  you can — and should — change this).

4) When you are done, turn of screen sharing using your SSH session:

sudo /System/Library/CoreServices/RemoteManagement/ARDAgent.app/Contents/Resources/kickstart -deactivate -configure -access -off


Problems connecting with your VNC client, like Chicken of the VNC?

Set your remote display settings to greyscale (to speed up things) or ‘Let server decide). Anything lower than ‘thousands’ won’t work.

defaults write com.apple.ScreenSharing controlObserveQuality 2